添加一个框架(C++)
目标: 学习如何在tf2中添加额外的帧。
教程级别: 中级
时间: 15分钟
内容
背景
在之前的教程中,我们通过编写 tf2广播器 和 tf2监听器 重新创建了乌龟演示。本教程将教你如何向转换树中添加额外的固定帧和动态帧。实际上,添加tf2帧与创建tf2广播器非常相似,但是这个示例将展示tf2的一些附加功能。
对于与变换相关的许多任务,以本地帧为基础更容易思考。例如,在激光扫描测量中,最容易理解的是以激光扫描仪中心的帧为基准。tf2允许你为系统中的每个传感器、链接或关节定义一个本地帧。在从一个帧转换到另一个帧时,tf2将处理引入的所有隐藏中间帧变换。
tf2树
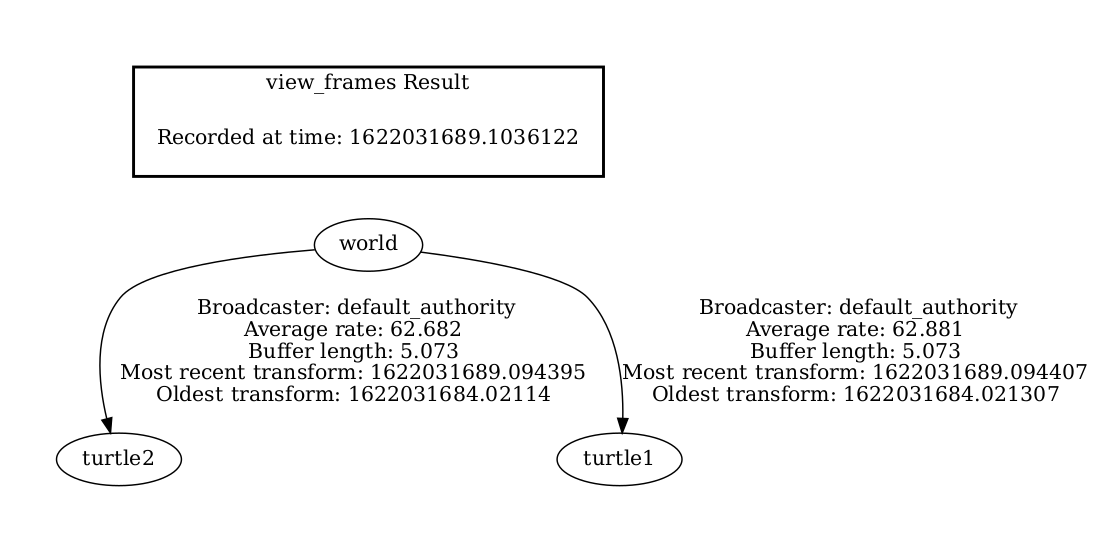
tf2构建了一个帧的树结构,因此不允许帧结构中存在闭环。这意味着一个帧只有一个父帧,但可以有多个子帧。目前,我们的tf2树包含三个帧:world、turtle1 和 turtle2。两个乌龟帧是 world 帧的子帧。如果我们想要在tf2中添加一个新的帧,需要选择三个现有帧中的一个作为父帧,新的帧将成为其子帧。
任务
1. 编写固定帧广播器
在我们的乌龟示例中,我们将添加一个名为“carrot1”的新框架,它将是“turtle1”的子框架。这个框架将作为第二只乌龟的目标。
首先创建源文件。转到我们在之前教程中创建的“learning_tf2_cpp”包。通过输入以下命令下载固定框架广播代码:
wget https://raw.githubusercontent.com/ros/geometry_tutorials/ros2/turtle_tf2_cpp/src/fixed_frame_tf2_broadcaster.cpp
wget https://raw.githubusercontent.com/ros/geometry_tutorials/ros2/turtle_tf2_cpp/src/fixed_frame_tf2_broadcaster.cpp
在 Windows 命令行提示符中:
curl -sk https://raw.githubusercontent.com/ros/geometry_tutorials/ros2/turtle_tf2_cpp/src/fixed_frame_tf2_broadcaster.cpp -o fixed_frame_tf2_broadcaster.cpp
或者在powershell中执行:
curl https://raw.githubusercontent.com/ros/geometry_tutorials/ros2/turtle_tf2_cpp/src/fixed_frame_tf2_broadcaster.cpp -o fixed_frame_tf2_broadcaster.cpp
现在打开名为“fixed_frame_tf2_broadcaster.cpp”的文件。
#include <chrono>
#include <functional>
#include <memory>

#include "geometry_msgs/msg/transform_stamped.hpp"
#include "rclcpp/rclcpp.hpp"
#include "tf2_ros/transform_broadcaster.h"

using namespace std::chrono_literals;

class FixedFrameBroadcaster : public rclcpp::Node
{
public:
  FixedFrameBroadcaster()
  : Node("fixed_frame_tf2_broadcaster")
  {
    tf_broadcaster_ = std::make_shared<tf2_ros::TransformBroadcaster>(this);
    timer_ = this->create_wall_timer(
      100ms, std::bind(&FixedFrameBroadcaster::broadcast_timer_callback, this));
  }

private:
  void broadcast_timer_callback()
  {
    geometry_msgs::msg::TransformStamped t;

    t.header.stamp = this->get_clock()->now();
    t.header.frame_id = "turtle1";
    t.child_frame_id = "carrot1";
    t.transform.translation.x = 0.0;
    t.transform.translation.y = 2.0;
    t.transform.translation.z = 0.0;
    t.transform.rotation.x = 0.0;
    t.transform.rotation.y = 0.0;
    t.transform.rotation.z = 0.0;
    t.transform.rotation.w = 1.0;

    tf_broadcaster_->sendTransform(t);
  }

rclcpp::TimerBase::SharedPtr timer_;
  std::shared_ptr<tf2_ros::TransformBroadcaster> tf_broadcaster_;
};

int main(int argc, char * argv[])
{
  rclcpp::init(argc, argv);
  rclcpp::spin(std::make_shared<FixedFrameBroadcaster>());
  rclcpp::shutdown();
  return 0;
}
这段代码与tf2广播器教程示例非常相似,唯一的区别是这里的变换不随时间改变。
1.1 检查代码
让我们看一下这段代码中的关键部分。在这里,我们创建了一个新的变换,从父框架“turtle1”到新的子框架“carrot1”。相对于“turtle1”框架,框架“carrot1”在y轴上偏移了2米。
geometry_msgs::msg::TransformStamped t;

t.header.stamp = this->get_clock()->now();
t.header.frame_id = "turtle1";
t.child_frame_id = "carrot1";
t.transform.translation.x = 0.0;
t.transform.translation.y = 2.0;
t.transform.translation.z = 0.0;
1.2 CMakeLists.txt
导航到“learning_tf2_cpp”目录的上一级,其中包含“CMakeLists.txt”和“package.xml”文件。
现在打开``CMakeLists.txt``文件,添加可执行文件,并将其命名为``fixed_frame_tf2_broadcaster``。
add_executable(fixed_frame_tf2_broadcaster src/fixed_frame_tf2_broadcaster.cpp)
ament_target_dependencies(
    fixed_frame_tf2_broadcaster
    geometry_msgs
    rclcpp
    tf2_ros
)
最后,添加``install(TARGETS...)``部分,以便``ros2 run``可以找到你的可执行文件:
install(TARGETS
    fixed_frame_tf2_broadcaster
    DESTINATION lib/${PROJECT_NAME})
1.3 编写启动文件
现在我们为这个示例创建一个启动文件。使用文本编辑器创建一个名为``turtle_tf2_fixed_frame_demo.launch.py``的新文件,并添加以下行:
import os

from ament_index_python.packages import get_package_share_directory

from launch import LaunchDescription
from launch.actions import IncludeLaunchDescription
from launch.launch_description_sources import PythonLaunchDescriptionSource

from launch_ros.actions import Node


def generate_launch_description():
    demo_nodes = IncludeLaunchDescription(
        PythonLaunchDescriptionSource([os.path.join(
            get_package_share_directory('learning_tf2_cpp'), 'launch'),
            '/turtle_tf2_demo.launch.py']),
        )

    return LaunchDescription([
        demo_nodes,
        Node(
            package='learning_tf2_cpp',
            executable='fixed_frame_tf2_broadcaster',
            name='fixed_broadcaster',
        ),
    ])
该启动文件导入所需的包,然后创建一个``demo_nodes``变量,用于存储我们在上一教程的启动文件中创建的节点。
代码的最后一部分将使用我们的``fixed_frame_tf2_broadcaster``节点将固定的``carrot1``帧添加到turtlesim世界中。
Node(
    package='learning_tf2_cpp',
    executable='fixed_frame_tf2_broadcaster',
    name='fixed_broadcaster',
),
1.4 构建
在你的工作空间的根目录中运行 rosdep,以检查缺少的依赖项。
rosdep install -i --from-path src --rosdistro humble -y
rosdep 只能在 Linux 上运行,所以你需要自己安装 geometry_msgs 和 turtlesim 依赖项。
rosdep 只能在 Linux 上运行,所以你需要自己安装 geometry_msgs 和 turtlesim 依赖项。
从你的工作空间的根目录中构建更新的软件包:
colcon build --packages-select learning_tf2_cpp
colcon build --packages-select learning_tf2_cpp
colcon build --merge-install --packages-select learning_tf2_cpp
打开一个新终端,进入你的工作空间的根目录,并源化设置文件:
. install/setup.bash
. install/setup.bash
# CMD
call install\setup.bat

# Powershell
.\install\setup.ps1
1.5 运行
现在你可以开始运行海龟广播器演示:
ros2 launch learning_tf2_cpp turtle_tf2_fixed_frame_demo.launch.py
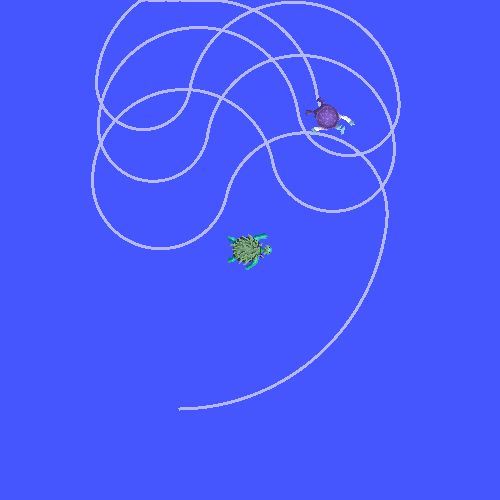
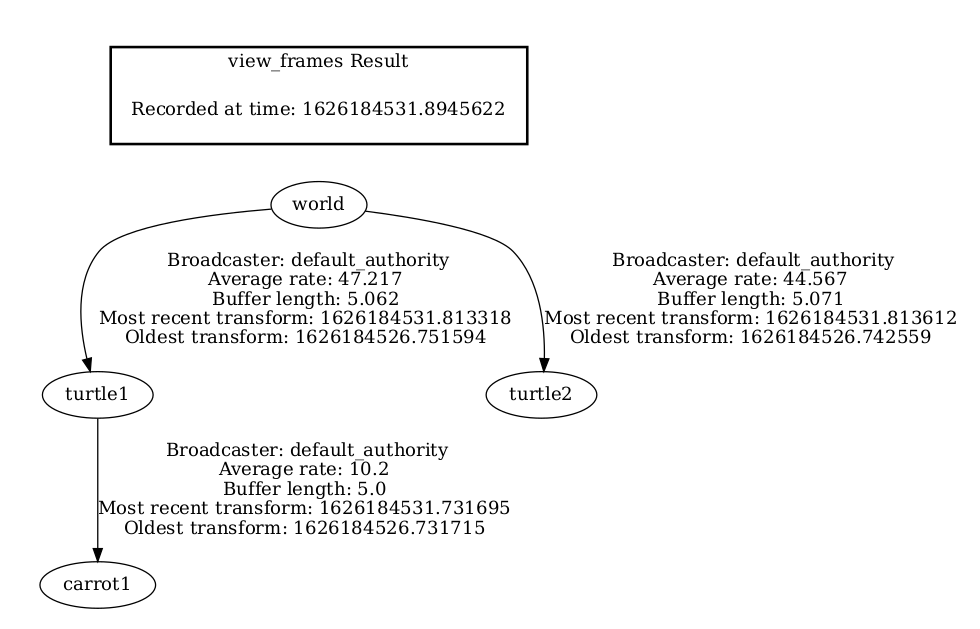
请注意新的 carrot1 帧已经出现在转换树中。
如果你让第一个海龟四处移动,你会注意到行为与上一个教程中没有改变,即使我们添加了一个新的帧。这是因为添加额外的帧不会影响其他帧,我们的监听器仍然使用先前定义的帧。
因此,如果我们希望第二只海龟跟随胡萝卜而不是第一只海龟,我们需要更改 target_frame 的值。有两种方法可以做到这一点。一种方法是直接从控制台将 target_frame 参数传递给启动文件:
ros2 launch learning_tf2_cpp turtle_tf2_fixed_frame_demo.launch.py target_frame:=carrot1
第二种方法是更新启动文件。为此,打开 turtle_tf2_fixed_frame_demo.launch.py 文件,并通过 launch_arguments 参数添加 'target_frame': 'carrot1' 参数。
def generate_launch_description():
    demo_nodes = IncludeLaunchDescription(
        ...,
        launch_arguments={'target_frame': 'carrot1'}.items(),
        )
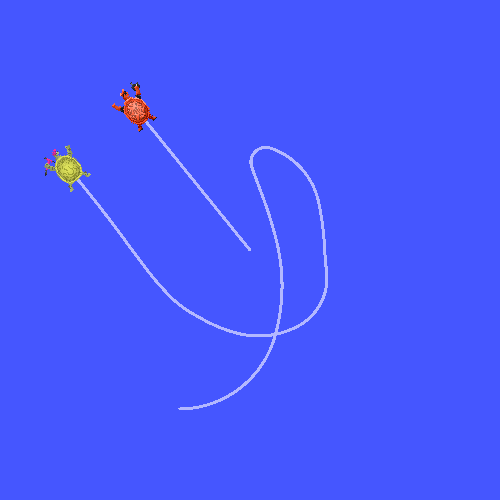
现在重新构建包,重新启动 turtle_tf2_fixed_frame_demo.launch.py,你将看到第二只海龟跟随胡萝卜而不是第一只海龟!
2 编写动态帧广播器
在本教程中,我们发布的额外帧是一个固定的帧,相对于父帧不会随时间变化。然而,如果你想要发布一个移动的帧,你可以编写广播器以随时间改变帧。让我们将``carrot1``帧改变成相对于``turtle1``帧随时间变化的帧。现在通过输入以下命令下载动态帧广播器的代码:
wget https://raw.githubusercontent.com/ros/geometry_tutorials/ros2/turtle_tf2_cpp/src/dynamic_frame_tf2_broadcaster.cpp
wget https://raw.githubusercontent.com/ros/geometry_tutorials/ros2/turtle_tf2_cpp/src/dynamic_frame_tf2_broadcaster.cpp
在 Windows 命令行提示符中:
curl -sk https://raw.githubusercontent.com/ros/geometry_tutorials/ros2/turtle_tf2_cpp/src/dynamic_frame_tf2_broadcaster.cpp -o dynamic_frame_tf2_broadcaster.cpp
或者在powershell中执行:
curl https://raw.githubusercontent.com/ros/geometry_tutorials/ros2/turtle_tf2_cpp/src/dynamic_frame_tf2_broadcaster.cpp -o dynamic_frame_tf2_broadcaster.cpp
现在打开名为``dynamic_frame_tf2_broadcaster.cpp``的文件:
#include <chrono>
#include <functional>
#include <memory>

#include "geometry_msgs/msg/transform_stamped.hpp"
#include "rclcpp/rclcpp.hpp"
#include "tf2_ros/transform_broadcaster.h"

using namespace std::chrono_literals;

const double PI = 3.141592653589793238463;

class DynamicFrameBroadcaster : public rclcpp::Node
{
public:
  DynamicFrameBroadcaster()
  : Node("dynamic_frame_tf2_broadcaster")
  {
    tf_broadcaster_ = std::make_shared<tf2_ros::TransformBroadcaster>(this);
    timer_ = this->create_wall_timer(
      100ms, std::bind(&DynamicFrameBroadcaster::broadcast_timer_callback, this));
  }

private:
  void broadcast_timer_callback()
  {
    rclcpp::Time now = this->get_clock()->now();
    double x = now.seconds() * PI;

    geometry_msgs::msg::TransformStamped t;
    t.header.stamp = now;
    t.header.frame_id = "turtle1";
    t.child_frame_id = "carrot1";
    t.transform.translation.x = 10 * sin(x);
    t.transform.translation.y = 10 * cos(x);
    t.transform.translation.z = 0.0;
    t.transform.rotation.x = 0.0;
    t.transform.rotation.y = 0.0;
    t.transform.rotation.z = 0.0;
    t.transform.rotation.w = 1.0;

    tf_broadcaster_->sendTransform(t);
  }

  rclcpp::TimerBase::SharedPtr timer_;
  std::shared_ptr<tf2_ros::TransformBroadcaster> tf_broadcaster_;
};

int main(int argc, char * argv[])
{
  rclcpp::init(argc, argv);
  rclcpp::spin(std::make_shared<DynamicFrameBroadcaster>());
  rclcpp::shutdown();
  return 0;
}
2.1 检查代码
我们不再使用固定的x和y偏移量定义,而是使用``sin()``和``cos()``函数来根据当前时间不断改变``carrot1``的偏移量。
double x = now.seconds() * PI;
...
t.transform.translation.x = 10 * sin(x);
t.transform.translation.y = 10 * cos(x);
2.2 CMakeLists.txt
导航到“learning_tf2_cpp”目录的上一级,其中包含“CMakeLists.txt”和“package.xml”文件。
现在打开``CMakeLists.txt``,添加可执行文件并将其命名为``dynamic_frame_tf2_broadcaster``。
add_executable(dynamic_frame_tf2_broadcaster src/dynamic_frame_tf2_broadcaster.cpp)
ament_target_dependencies(
    dynamic_frame_tf2_broadcaster
    geometry_msgs
    rclcpp
    tf2_ros
)
最后,添加``install(TARGETS...)``部分,以便``ros2 run``可以找到你的可执行文件:
install(TARGETS
    dynamic_frame_tf2_broadcaster
    DESTINATION lib/${PROJECT_NAME})
2.3 编写启动文件
为了测试这段代码,请创建一个名为``turtle_tf2_dynamic_frame_demo.launch.py``的新启动文件,并粘贴以下代码:
import os

from ament_index_python.packages import get_package_share_directory

from launch import LaunchDescription
from launch.actions import IncludeLaunchDescription
from launch.launch_description_sources import PythonLaunchDescriptionSource

from launch_ros.actions import Node


def generate_launch_description():
    demo_nodes = IncludeLaunchDescription(
        PythonLaunchDescriptionSource([os.path.join(
            get_package_share_directory('learning_tf2_cpp'), 'launch'),
            '/turtle_tf2_demo.launch.py']),
        launch_arguments={'target_frame': 'carrot1'}.items(),
        )

    return LaunchDescription([
        demo_nodes,
        Node(
            package='learning_tf2_cpp',
            executable='dynamic_frame_tf2_broadcaster',
            name='dynamic_broadcaster',
        ),
    ])
2.4 构建
在你的工作空间的根目录中运行 rosdep,以检查缺少的依赖项。
rosdep install -i --from-path src --rosdistro humble -y
rosdep 只能在 Linux 上运行,所以你需要自己安装 geometry_msgs 和 turtlesim 依赖项。
rosdep 只能在 Linux 上运行,所以你需要自己安装 geometry_msgs 和 turtlesim 依赖项。
从你的工作空间的根目录中构建更新的软件包:
colcon build --packages-select learning_tf2_cpp
colcon build --packages-select learning_tf2_cpp
colcon build --merge-install --packages-select learning_tf2_cpp
打开一个新终端,进入你的工作空间的根目录,并源化设置文件:
. install/setup.bash
. install/setup.bash
# CMD
call install\setup.bat

# Powershell
.\install\setup.ps1