向BT添加平滑器
要求
您必须安装Nav2和Turtlebot3。如果您尚未安装它们,请参照:ref:getting_started 进行安装。您还必须拥有一个工作的行为树,例如Nav2 BT Navigator包提供的行为树,以供编辑。您还应该有一个 nav2_params.yaml 文件的副本,用于编辑您的系统。
教程步骤
0- 熟悉平滑器BT节点
The 平滑路径 BT node is a behavior tree node that interacts with the smoother task server similar to that which you may expect to find for the planner or controller servers. It contains the action client to call the server and specifies its arguments and return types as BT ports. It too calls the server via an action interface that may be seperately interacted with via other servers and client library languages.
请参阅BT节点的配置页面,以熟悉所有方面,但要注意的核心端口是 unsmoothed_path 输入端口和 smoothed_path 输出端口。前者接收来自规划算法的原始路径,后者设置平滑后输出路径的值。还提供了其他端口,完全实现了平滑器服务器的操作API。
1- 指定平滑器插件
为了在BT节点中使用平滑器,首先必须配置平滑器服务器本身,以包含感兴趣的平滑器插件。这些插件实现了您想要使用的特定算法。
对于每个您想使用的平滑器插件,必须为其指定一个名称(例如 simple_smoother,curvature_smoother)。这个名称是其他服务器通过请求与平滑器服务器的动作接口交互时使用的 smoother_id。
在每个名称下,必须指定特定算法的参数,以及用于加载给定算法库的 plugin 名称。下面显示了一个示例配置,其中包含两个平滑器插件,可用于您机器人的 nav2_params.yaml。
smoother_server:
  ros__parameters:
    costmap_topic: global_costmap/costmap_raw
    footprint_topic: global_costmap/published_footprint
    robot_base_frame: base_link
    transform_timeout: 0.1
    smoother_plugins: ["simple_smoother", "curvature_smoother"]
    simple_smoother:
      plugin: "nav2_smoother::SimpleSmoother"
      tolerance: 1.0e-10
      do_refinement: True
    curvature_smoother:
      plugin: "nav2_ceres_costaware_smoother/CeresCostawareSmoother"
2- 修改您的BT XML
现在,您已经选择并配置了给定插件的平滑服务器,是时候在导航行为的行为树中使用这些平滑器了。虽然在BT中有许多使用平滑器的地方/方法,但下面显示的可能是您最有可能使用平滑器的情况(平滑路径规划返回的路径,然后使用平滑后的路径进行路径跟踪)。
注意:如果您只使用一种类型的平滑算法,则无需在BT XML条目中指定 smoother_id。由于只有一个选项,对于未明确请求平滑器插件的任何请求,都将使用该选项。但是,如果您使用多个平滑器插件,则**必须**填充 smoother_id XML端口。
给定的行为树将有一行:
<ComputePathToPose goal="{goal}" path="{path}" planner_id="GridBased" error_code_id="{compute_path_error_code}"/>
这行代码调用规划器服务器并将路径返回到行为树的 path 黑板变量中。我们将使用以下代码替换该行,以计算路径、平滑路径,并最后用新的平滑路径替换系统将要与之交互的 path 黑板变量:
<Sequence name="ComputeAndSmoothPath">
  <ComputePathToPose goal="{goal}" path="{path}" planner_id="GridBased" error_code_id="{compute_path_error_code}"/>
  <SmoothPath unsmoothed_path="{path}" smoothed_path="{path}" error_code_id="{smoother_error_code}"/>
</Sequence>
如果您希望对平滑器错误代码进行恢复,例如触发行为树的系统恢复分支:
<Sequence name= "TryToResolveSmootherErrorCodes">
  <WouldASmootherRecoveryHelp error_code="{smoother_error_code}">
  <!-- recovery to resolve smoother error code goes here -->
<Sequence/>
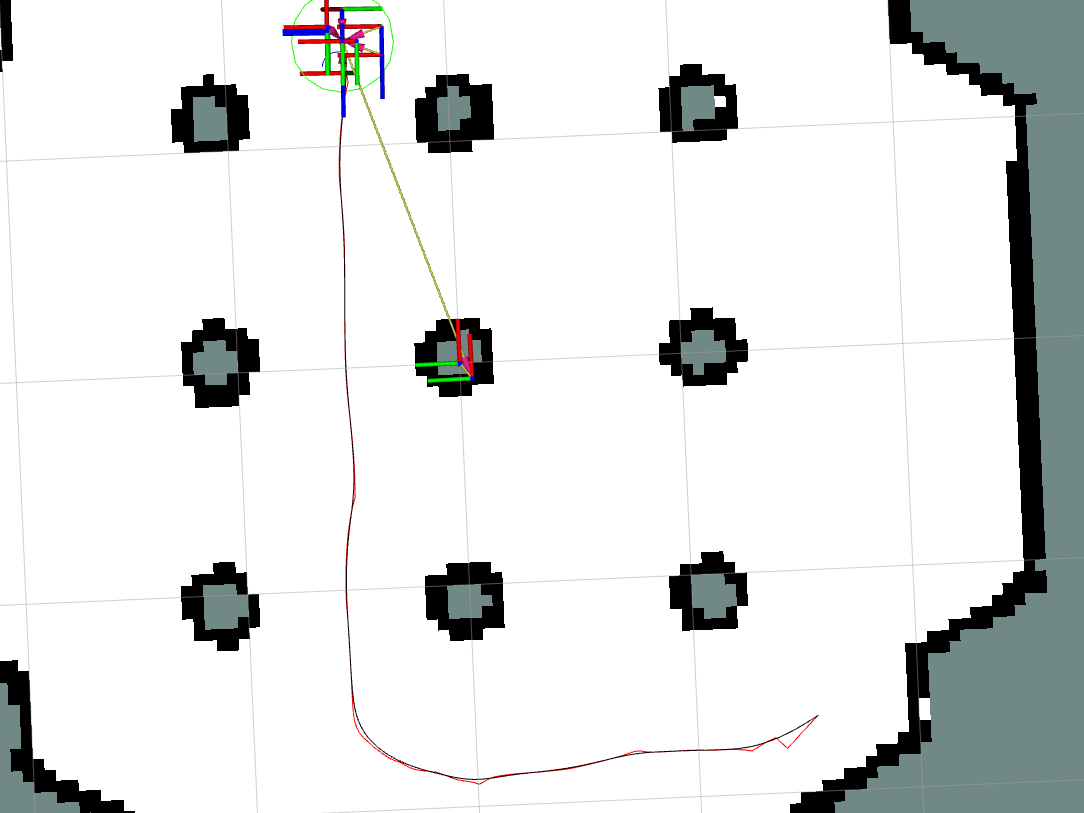
就是这么简单!您现在可以在系统中编译或使用这个行为树,并观察到计划路径已经平滑,控制器现在正在跟踪这条平滑路径。教程顶部的图像显示了来自NavFn的未平滑路径(红色)和平滑路径(黑色)。请注意在直线段中朝目标、转弯和过渡方面的平滑性。
如果您希望看到差异,但不跟踪平滑后的路径,您可能希望删除``smoothed_path="{path}"部分以计算平滑后的路径,但不用它替换原始路径。相反,主题/smoothed_path``包含由平滑服务器发布的此信息,用于可视化或系统的其他部分使用。您还可以将平滑路径重新映射到另一个黑板变量,以在行为树的其他部分与其交互(例如``smoothed_path="{smoothed_path}"``)。